一些零碎的关于ABP整理的记录。automapper实体更新,
ABP_Vnext中实体的更新
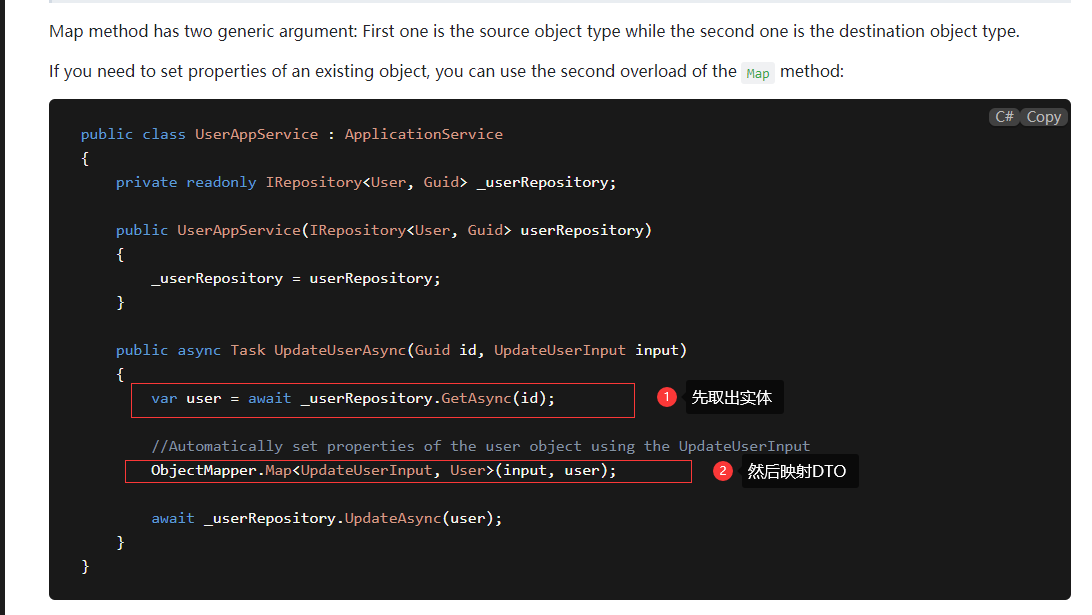
参考官方文档:https://docs.abp.io/en/abp/4.4/Object-To-Object-Mapping 这个地方很容易忽视,造成实体对象无法更新写入数据库。
注意对比官方的使用,下面这里的代码写法是一种错误的写法。实体从数据库取出来之后,经过映射会自动跟踪,不需要再次赋值。否则会出现如下错误:
{"data":null,"succeed":false,"code":"500","msg":"The instance of entity type 'BgeInfo' cannot be tracked because another instance with the same key value for {'Id'} is already being tracked. When attaching existing entities, ensure that only one entity instance with a given key value is attached. Consider using 'DbContextOptionsBuilder.EnableSensitiveDataLogging' to see the conflicting key values.","timeticks":1647597741807}
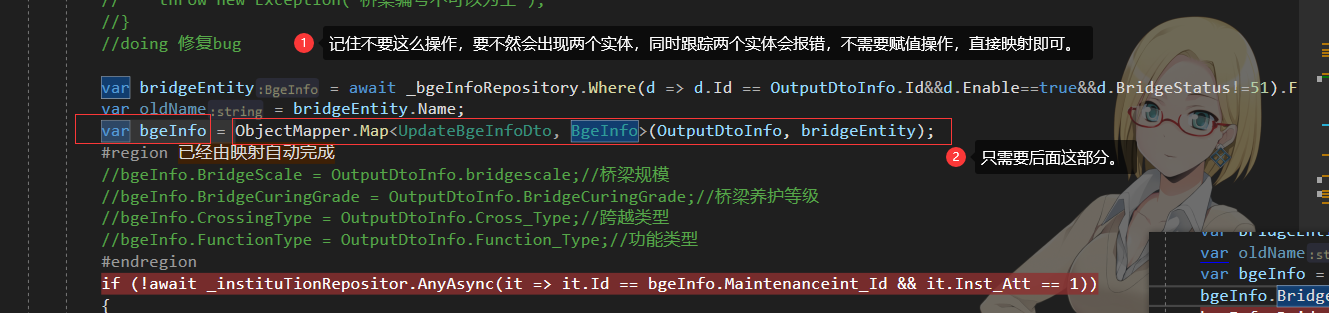
AutoMapper正确更新Entity的步骤如下:先取出Entity实体,然后Dto映射实体,进行对实体的更新,映射的时候不再需要使用等号去赋值。
ABP_Vnext微服务项目
ABP框架是基于规则和约定的,框架内部有非常多默认的规则和约定。
规则约定
Application层对外暴露的DTO会写在Application.Contracts中,而如果是Application层和Domain层交互使用的DTO则写在DomainShared中(内部交互)。
微服务
ABP_Vnext微服务架构,参考文档:ABP Framework微服务文档
IIS调试部署
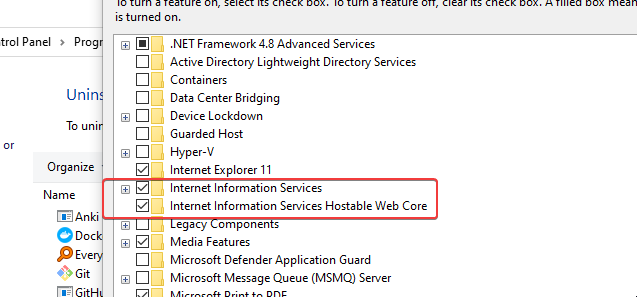
给windows添加IIS的时候,全部勾选上必要的选项;
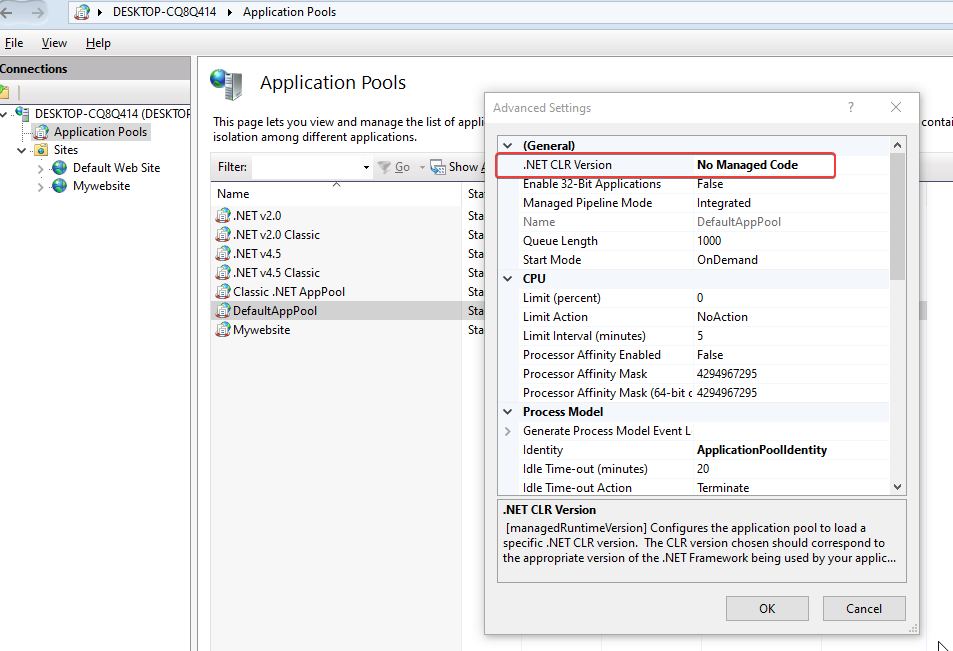
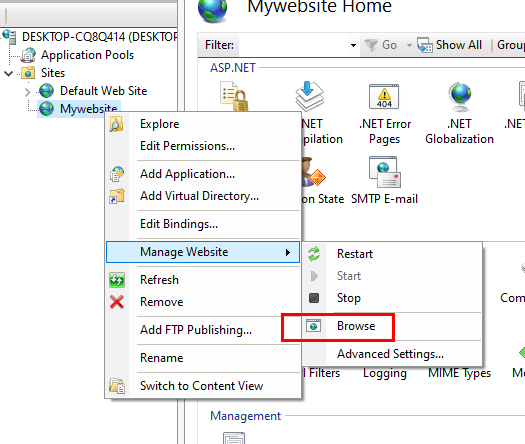
然后win + R ,输入inetmgr 打开IIS管理面板。
1.首先是在IIS中建立好一个Server,比如:Mywebsite,路径设置为C盘中的C:\inetpub\wwwroot\Mywebsite.然后把默认的APP池设置为No Managed Code。
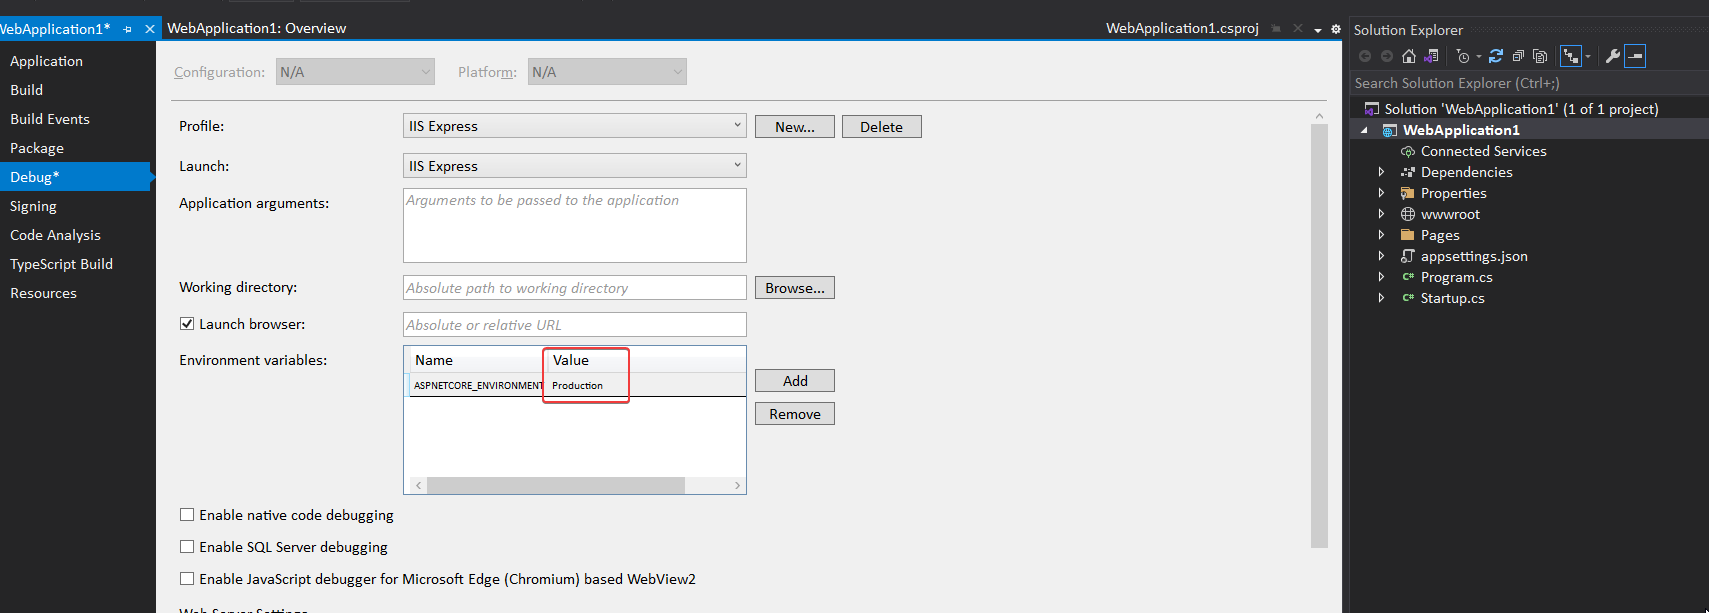
2.把项目属性中的debug环境设置Development改为Production,这是发布到IIS之前需要做的事情。
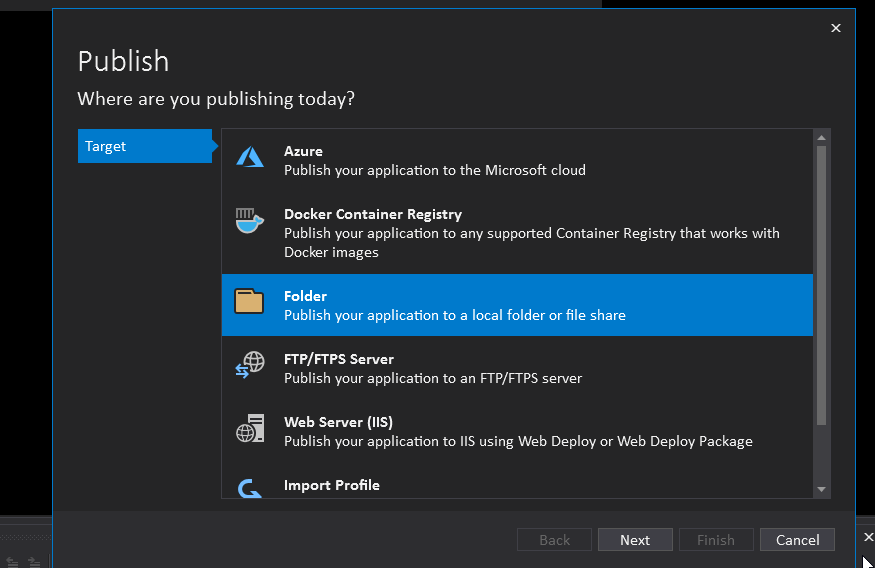
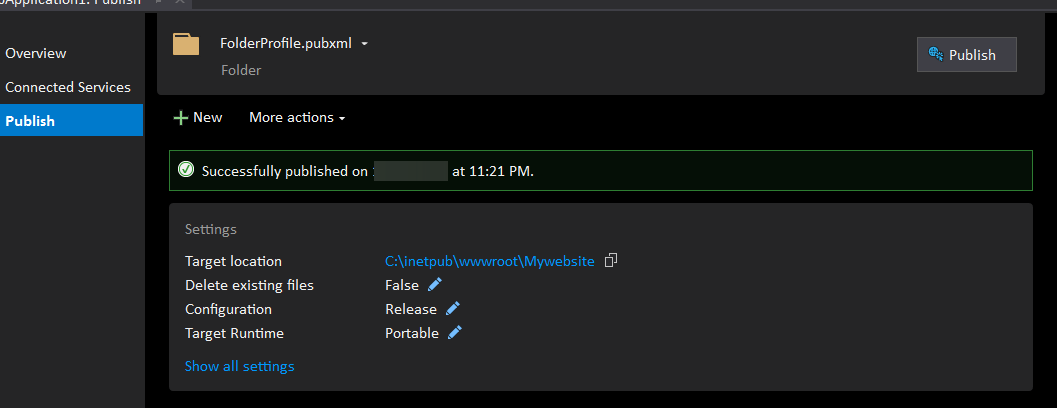
3.然后是发布到本地电脑的某个文件夹中:
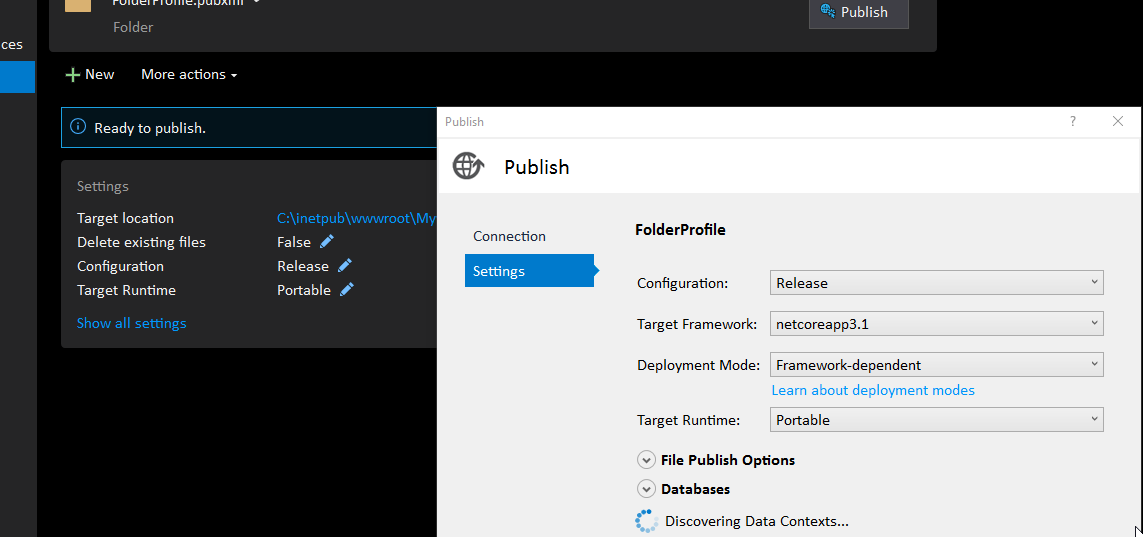
4.这里设置Portable是为了让Dotnetcore程序可以运行在任何类型的操作系统环境中,是跨平台的,默认就是这么设置的。
5.如果是发布程序到C盘,那么请用administrator打开visual studio 2019并执行发布操作。
6.最后需要安装DotNetCore的Host模块。
参考微软官方文档:Host ASP.NET Core on Windows with IIS,直接下载最新版本的Hosting Bundle。
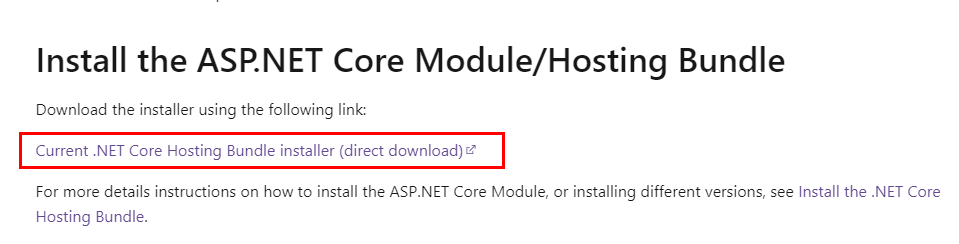
参考上面这个链接提供的信息,安装IIS的DotNet Host模块。安装完成之后,发布到IIS目录下面的项目就可以访问了。
常见问题
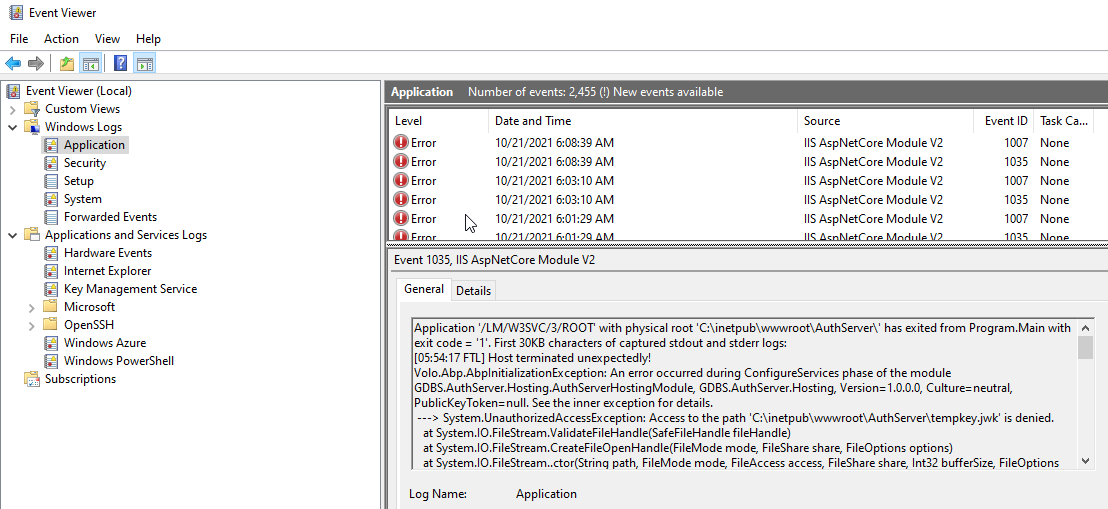
IIS部署完微服务之后,访问本地微服务端口会报错,查看EventViewer能够发现更具体的报错信息,是因为我们把程序发布到C盘,系统盘没有访问权限导致的。
如果是发布DotNetCore程序到本地win10机器的C盘,会出现Access Denied 。需要配置文件夹访问权限。需要设置inetpub下面www文件夹的Everyone访问权限。参考资料 设置c盘inetpub_wwwroot目录权限
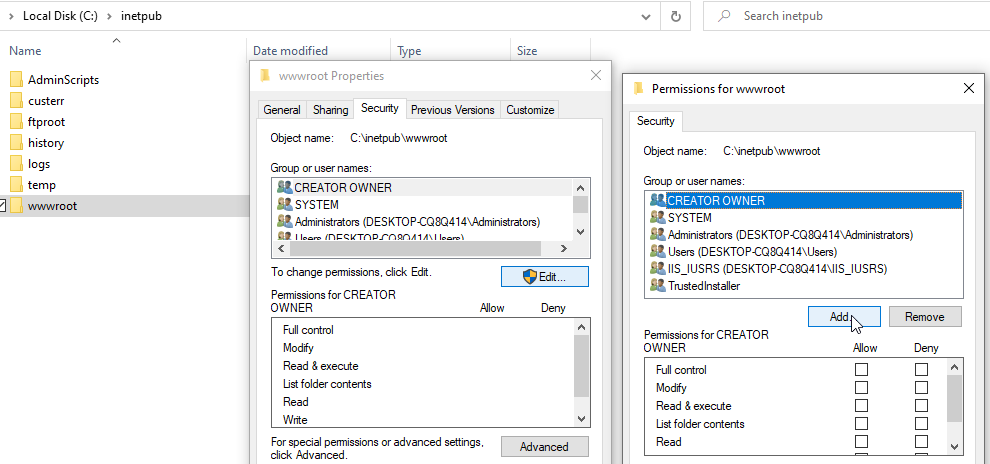
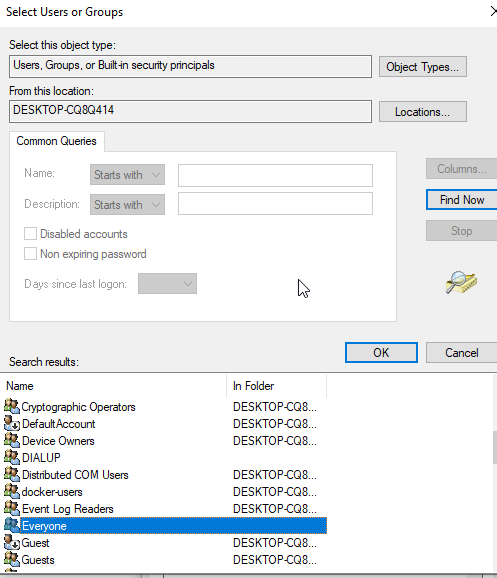

给予全部访问权限即可,设置完成之后,发布到C盘inetpub/wwwroot目录下面的所有.net core程序访问权限就具备了。
生成Swagger文档没有注释
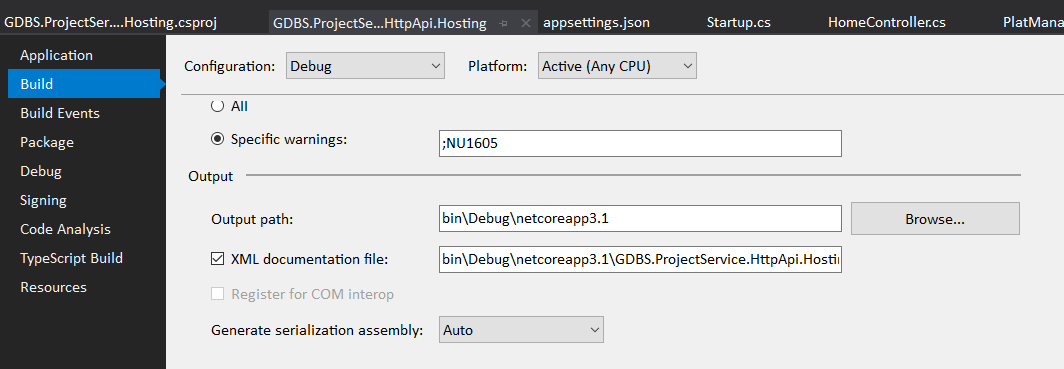
注意查看当前项目的Build设置,如果是处于Debug模式,则下图3个地方都要是Debug的路径和设置。如果是Release情况,则都要设置为Release的设置。必须一致,要不然不会生成带有注释的文档。
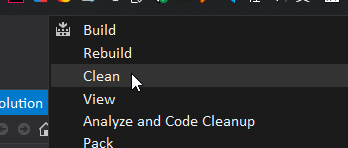
特别注意:如果频繁修改API接口的形参注释信息,最好是清空SwaggerXml路径下面的HttpApi.xml文件,重新生成。重新编译是不会生成的,一定要清理Clean项目,之后重新生成,会自动生成并刷新API备注那些信息。

在httpApi解决方案中配置:
..\GDBS.ProjectService.HttpApi.Hosting\SwaggerXml\GDBS.ProjectService.HttpApi.xml

SwaggerXml文件不更新
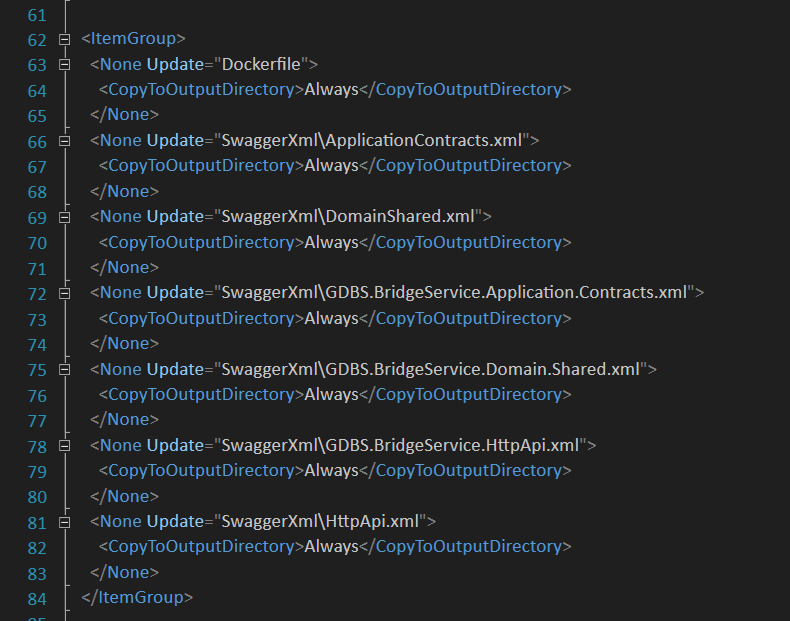
如果发现微服务中其他项目不能正确生成最新的xml Swagger文件,可以Edit Project file,来手动修复此问题。下面是一段关键的xml配置参考代码:
 <ItemGroup>
    <None Update="Dockerfile">
      <CopyToOutputDirectory>Always</CopyToOutputDirectory>
    </None>
    <None Update="SwaggerXml\ApplicationContracts.xml">
      <CopyToOutputDirectory>Always</CopyToOutputDirectory>
    </None>
    <None Update="SwaggerXml\DomainShared.xml">
      <CopyToOutputDirectory>Always</CopyToOutputDirectory>
    </None>
    <None Update="SwaggerXml\GDBS.BridgeService.Application.Contracts.xml">
      <CopyToOutputDirectory>Always</CopyToOutputDirectory>
    </None>
    <None Update="SwaggerXml\GDBS.BridgeService.Domain.Shared.xml">
      <CopyToOutputDirectory>Always</CopyToOutputDirectory>
    </None>
    <None Update="SwaggerXml\GDBS.BridgeService.HttpApi.xml">
      <CopyToOutputDirectory>Always</CopyToOutputDirectory>
    </None>
    <None Update="SwaggerXml\HttpApi.xml">
      <CopyToOutputDirectory>Always</CopyToOutputDirectory>
    </None>
  </ItemGroup>
架构中间件
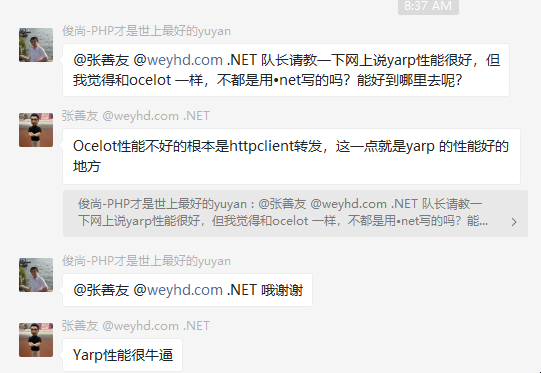
网关这块目前使用的是Ocelot,据说微软官方开源的yarp性能更强。
手动控制uow
手动控制uow(unitofwork): 首先是注入类:
private readonly IUnitOfWorkManager _unitOfWorkManager;
然后是:
 using var uow = _unitOfWorkManager.Begin(requiresNew:true,isTransactional:true,timeout:15000);
//中间是数据库操作
await uow.CompleteAsync();
ABP切换其他数据库
在实际开发中经常会有要临时切换到其他的数据库,操作完成之后再切换回来的这种场景。也就是说我们想要临时去修改我们DbContext的链接字符串,怎么做呢?就是如下的做法:
可以参考ABP源码中 UnitOfWorkDbContextProvider.cs中的代码: DbContextCreationContext
private TDbContext CreateDbContext(IUnitOfWork unitOfWork, string connectionStringName, string connectionString)
        {
            var creationContext = new DbContextCreationContext(connectionStringName, connectionString);
            using (DbContextCreationContext.Use(creationContext))
            {
                var dbContext = CreateDbContext(unitOfWork);

                if (dbContext is IAbpEfCoreDbContext abpEfCoreDbContext)
                {
                    abpEfCoreDbContext.Initialize(
                        new AbpEfCoreDbContextInitializationContext(
                            unitOfWork
                        )
                    );
                }

                return dbContext;
            }
        }
上面的代码,实际上是用当前临时的connectionString去替代我们的DbContext中的那个连接字符串,使用完毕之后在dispose掉之后替换回原来的connectionString .替换成临时connectionString之后,再利用DbContextProvider去get到DbContext,得到的就是临时connectionstring对应的数据库,而不是confugure里面配置的原有DbContext. 以上方法来源于 :
 namespace Volo.Abp.Uow.EntityFrameworkCore
{
     public class UnitOfWorkDbContextProvider<TDbContext> : IDbContextProvider<TDbContext>
        where TDbContext : IEfCoreDbContext
    {
            private TDbContext CreateDbContext(IUnitOfWork unitOfWork, string connectionStringName, string connectionString)
        {

        }
     }
 }
注意:要创建自己的DbContext需要再using里面创建,再using外面创建是没有用的。
Ocelot文档
参考:https://ocelot.readthedocs.io/en/latest/features/servicediscovery.html
用户名密码验证
ABP中主要是通过ResourceOwnerPasswordValidationContext 来验证用户UserNanem和Password。
ABP框架源码: TokenRequestValidator.cs 这个文件下面包括了主要的grantType验证方式。
如果是我们自己实现用户名和密码验证方式,我们需要自己实现IResourceOwnerPasswordValidator这个接口。
如果是web端走跳转的方式,一般是使用OIDC方式,也就是OpenIdConnect.
第三方验证登陆
在ABP框架源码的’abp-3.3.0\modules\identityserver’中,这个模块就是IdentityServer4相关的;
Volo.Abp.IdentityServer.AbpIdentityServerDomainModule文件中,76行代码开始的地方,
\abp-3.3.0\modules\identityserver\src\Volo.Abp.IdentityServer.Domain\Volo\Abp\IdentityServer\AbpIdentityServerDomainModule.cs

services.ExecutePreConfiguredActions(identityServerBuilder);

            if (!services.IsAdded<IPersistedGrantService>())
            {
                services.TryAddSingleton<IPersistedGrantStore, InMemoryPersistedGrantStore>();//保存登陆页信息的,GrantStore就是我们授权的信息,跳转到登陆页的时候,勾选的scope信息就是保存在这里
            }

            if (!services.IsAdded<IDeviceFlowStore>())
            {
                services.TryAddSingleton<IDeviceFlowStore, InMemoryDeviceFlowStore>();//设备信息
            }

            if (!services.IsAdded<IClientStore>())
            {
                identityServerBuilder.AddInMemoryClients(configuration.GetSection("IdentityServer:Clients"));
            }

            if (!services.IsAdded<IResourceStore>())
            {
                identityServerBuilder.AddInMemoryApiResources(configuration.GetSection("IdentityServer:ApiResources"));
                identityServerBuilder.AddInMemoryIdentityResources(configuration.GetSection("IdentityServer:IdentityResources"));
            }

//identityServerBuilder.AddExtensionGrantValidator<LinkLoginExtensionGrantValidator>();
//最后这句代码,是根据自己的需要在模块源码中自定义的,用来对接第三方登陆。比如对接第三方twitter或者google登陆到我们自己的系统。
公司的源码是基于ABP3.0.5的,如果要支持这个module扩展,可能需要升级。
Volo.Abp.IdentiyServer.EntityFrameworkCore这个是做持久化的,如果没有安装这个依赖,则会放到内存里面。
以下7个依赖项就可以搭建出自己的IdentityServer:
Volo.Abp.Identity.Application;
Volo.Abp.Identity.EntityFrameworkCore;
Volo.Abp.Identity.Web
Volo.Abp.IdentityServer.EntityFrameworkCore;
Volo.Abp.Account.Application;
Volo.Abp.Account.Web.IdentityServer;//这个是必选项
Volo.Abp.AspNetCore.Authentication.Jwtbearer;//如果需要对外公开API就需要安装这个
基于IdentityServer4的管理后台
参考:https://github.com/skoruba/IdentityServer4.Admin
ABP Vnext中常见坑
微服务的时候最常见的就是注入的报错。
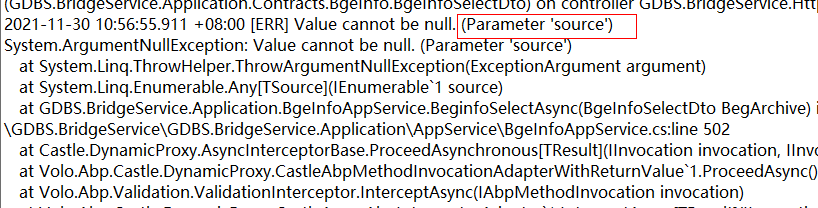
上面这种Parameter’source’报错,一般都是注入的报错。
DbContext中的Service要和Application里面的一致
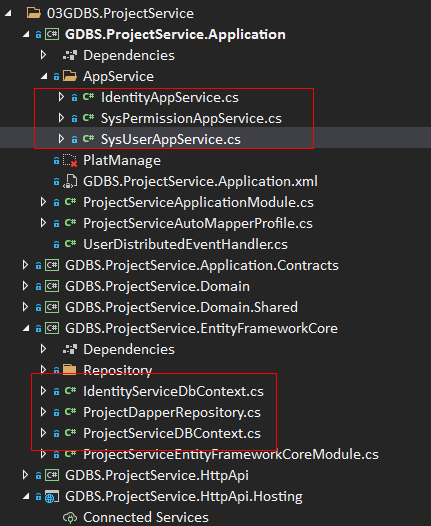
要不然会发生某些Entity实体类注入的问题。
微服务接口调用的时候 400错误
在微服务之间Post调用接口的时候,被调用方的参数类型如果不能为空,没有打上问号,而调用方这边没有给默认值,那么缺省值就会是Null,导致被调用方参数检测的时候,直接报错,但是这个错误并不会反馈给调用者,调用者这边看到的只是400或者403错误。一般这种情况下,要约定好参数DTO,防止躺坑。
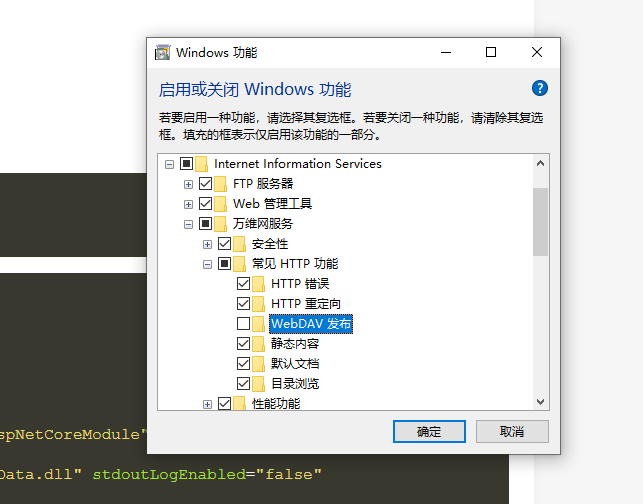
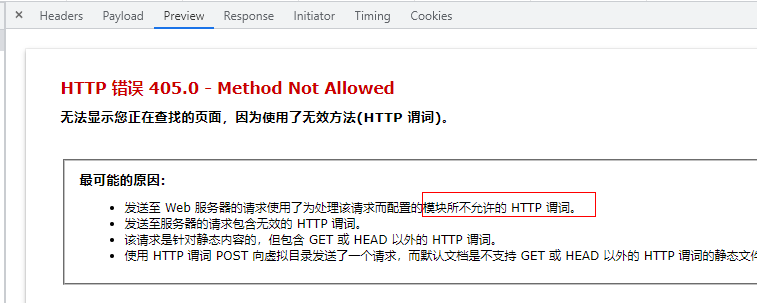
IIS不支持DELETE ,PUT谓词
解决办法参考:https://www.bbsmax.com/A/o75NxLwMzW/, 因为是本地调试,所以直接修改IIS,去掉WebDAV发布模块。重启win10即可搞定。如下:
线上发布的是Linux服务器,用的是自托管,而windows调试的时候用的是iis托管,已经允许了所有谓词的情况下,还会出现某些API请求被拒绝的问题。
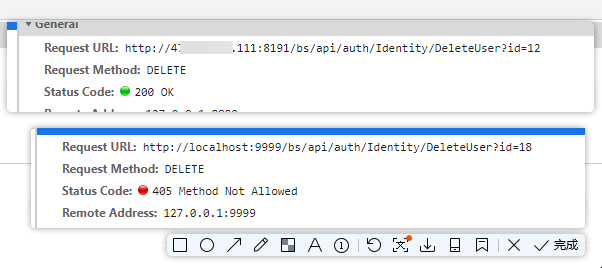
如上,同样的两个方法,一个是在Linux上面部署,一个是本地localhost调试iis托管,出现DELETE操作405的情况。
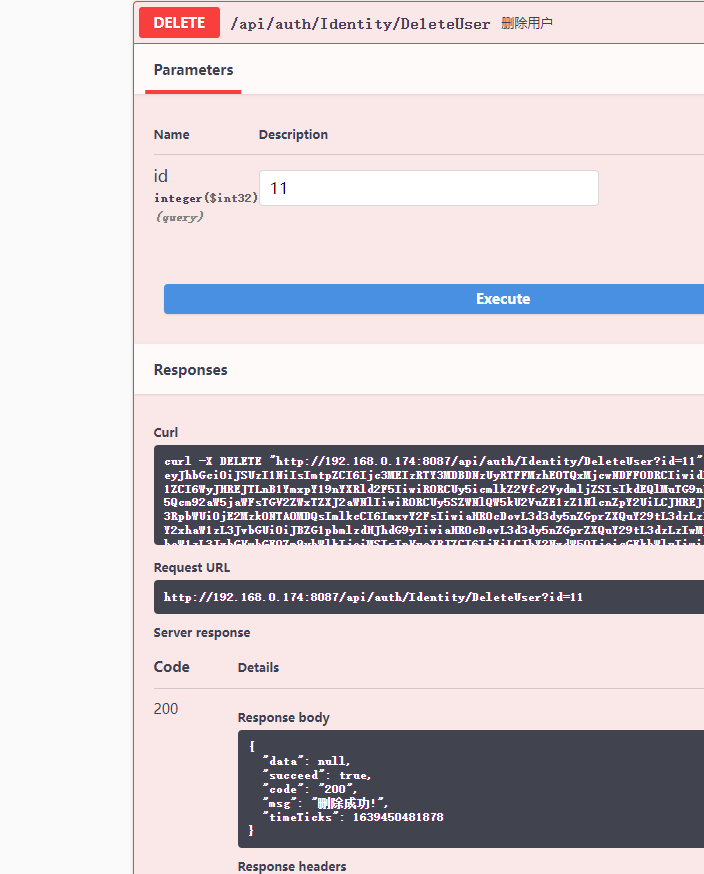
重启之后,在我们本地的API执行DELETE接口就成功了。
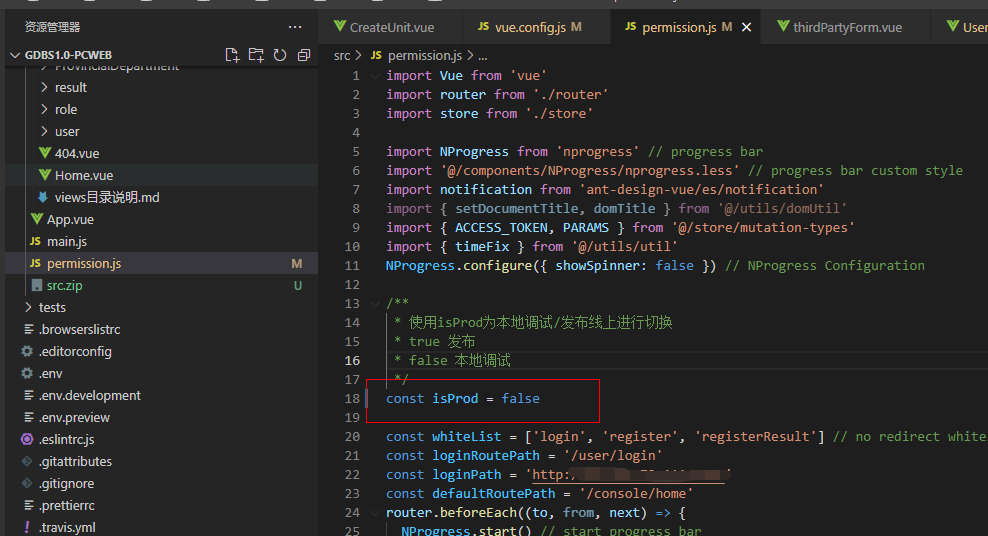
前端配置注意事项
原型设计
DotNetCore进阶
Dapr + K8s的部署, CI/CD环境搭建。
ABP Vnext的SAAS模式开发。
跨服务调用报URI格式不正确
这种情况一般发生在API调用地址从qq里面传送的时候,编码发生变化,然后复制粘贴到visual studio里面,调试的时候肉眼是看不出来的,提交url给到同事的时候最好是确保url地址的编码格式正确。
文档信息
- 本文作者:hillcat
- 本文链接:https://cs-cn.top/2019/06/23/ABP_Vnext_Microservice/
- 版权声明:自由转载-非商用-非衍生-保持署名(创意共享3.0许可证)